Forms are old-school web tech. Unfortunately, in today’s JavaScript-saturated web, they are somewhat out of fashion.
The problem is that a plain HTML form requires a page navigation. It works like clicking a link to another
site: the flash of white, the 2 seconds of loading time (if you’re lucky), losing your scroll position, etc. That just
doesn’t fly in a world full of single-page applications with expectations of instant response and constant
interactivity.
The <hotfx-form> element wraps a generic <form> element and makes it more suitable
for the modern day. It submits plain HTML forms using JavaScript—without requiring you to write a single
line of JavaScript! With this element your users stay on the same page and get instant feedback.
Simple HotFX Form
The demo above shows a complete form in action. It’s got native form validation, custom error messages, shows a server
error, a thanks message, a reset button— the works!
We’ll get into all the parts below, but just to prove to you this thing is actually working, the messages are sent to a
simple backend built for this demo at form-hole.squids.online, where you
can view all the submissions. Content warning: the submissions are not moderated and I posted this page on Reddit so,
well, you know what to expect.
Here’s the best part about this custom element: the form works just fine without JavaScript. How’s that
for progressive enhancement!
These days, requiring JavaScript for a form submission is normal, even expected. Indeed, it’s probably quite exceptional
that you wouldn’t require it. But what if your JavaScript doesn’t load for some reason? Do you want your form
to be totally inoperable? Well, I hope that never happens to you and maybe if you’ve done your work properly, it never
will.
But we’re talking about some serious terminal-dweller street cred with this move. Imagine your coworker sallies up to
your desk. “Try this form,” you say. Well you know you can’t impress anyone with that, but how about: “Now try it
without JavaScript.” You’ll be basking in that glorious moment for all eternity.
Here’s the exact same form as above, but this time I have removed the script for the HotFX form element. It still works!
The Exact Same Form With No JavaScript
Usage
To use the custom element yourself, add this script to your page:
Then wrap your form (or forms!) in the <hotfx-form> element. That’s it! The hard part will be
designing the form and figuring out where to send the data.
Sending Submissions to Zapier (And Beyond)
This precious information that your readers are sending needs to go somewhere. The form hole is cute and all, but when
you’re done playing around, you’ll probably want this data sent to you— to your email, to your email list, to
your CRM, etc.
The easiest way to send it anywhere is probably to just send it to Zapier and have them push it to whatever service you
want as the ultimate destination. To send a form to a Zap, use the “Catch Hook” from “Webhooks by Zapier”. Explaining
this whole process is a bit out of scope for this article, but suffice it to say that you can set this up with about 10
minutes of playing around and googling.
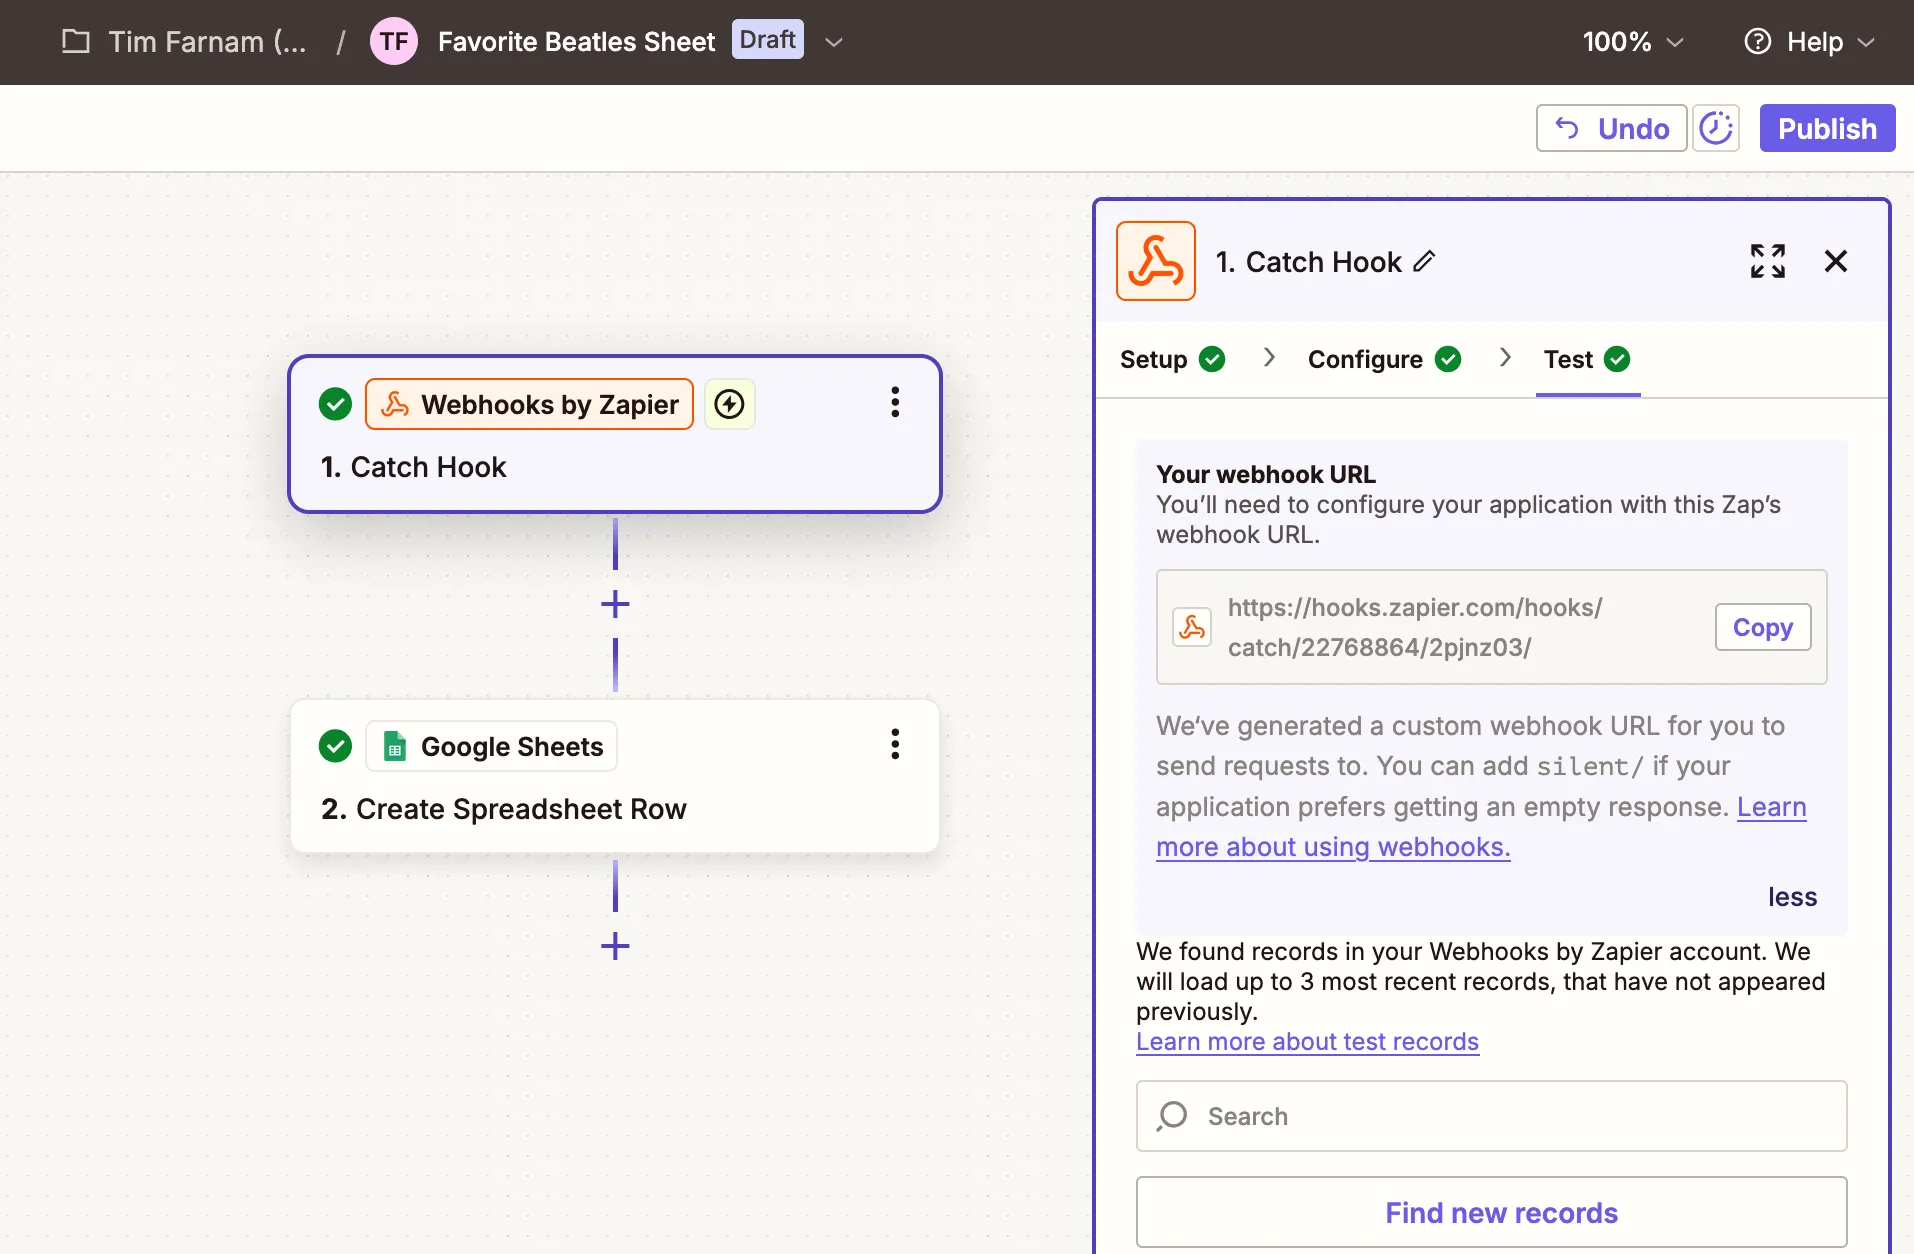
This is what the Zap looks like in the Zapier console.
At the end you’ll get a URL for the webhook where you can send POST responses. You can see it in the above screenshot
below “Your webhook URL”. Set that as the action attribute on your form and you’re pretty much good to go.
I made a quick demo that uses Zapier to append form submissions it to the bottom of a Google Sheet. Since this was only
a two-step Zap I thought it would fall into the free tier, but it turns out that webhooks are only for paid users. As of
writing, Zapier’s minimum plan costs $20/month (eww).
If you just want to send the form responses to your email, you can use Formspree or
formcarry, which both currently allow 50 submissions a month for free.
Getting Form Submissions Into Google Sheets — For Free!
Thoroughly disappointed with Zapier, I was determined to salvage my demo and get form responses into a Google Sheet for
free. With a little trickery I was able to get the form below to submit responses directly into this
sheet.
Google Sheets Demo
To make the results a little less boring, I’m also secretly collecting some analytics about the submissions: the user’s
time zone, their operating system version and language. (Yes, your browser is always spying on you.)
This form sends the data directly to a Google Apps Script which then adds it to the spreadsheet. Again, deploying this
script is a little bit out of the scope of this article, but there’s plenty of information online and some AI will be
thrilled to help you of course.
Google Apps Script
function doPost(e) {
  try {
    SpreadsheetApp
      // Customize this with the ID of your spreadsheet
      .openById('1R77nKNStxWyaOOTXiFNC642arUPJwERFDjbBU1DCRiE')
      .getActiveSheet()
      .appendRow([
        // Customize your form's parameters here
        e.parameter['favorite-beatle'] || '',
        e.parameter['platform'] || '',
        e.parameter['time-zone'] || '',
        e.parameter['locale'] || '',
        new Date(),
      ]);
    return ContentService
      .createTextOutput('Form submitted successfully')
      .setMimeType(ContentService.MimeType.TEXT)
  } catch (error) {
    console.error('Error processing form submission:', error);
    return ContentService
      .createTextOutput('Error submitting form')
      .setMimeType(ContentService.MimeType.TEXT)
  }
}
Show the “Thanks” Message
The <hotfx-form> element gets rid of the page navigation by submitting the form using the Fetch API,
but we still need to let the user know that everything worked out as intended.
To show the “Thanks!” message we can use the :state(success) pseudo class. So something like this:
You can style this message however you want. To see how we built our demo, take a look at this style sheet. To be sure, we built the demo using Hot Page, but you
can use it on any web site.
Native Input Validation
A form without validation would be total chaos. Luckily, the browser has you covered. There are several
HTML attributes that let you validate inputs and show messages to users:
required makes sure the field is not empty
minLength / maxLength validate the number of characters
pattern checks the value against a regular expression
Fields for numbers (type=number), dates (type=date) and sliders (type=range) also
get special attributes that will validate them: min, max and step.
Other types of inputs, like email and url will automatically validate for their type.
These are great basics. Here’s the same for above with the native error messages shown.
Form with Native Validation Messages
Custom Error Messages
I don’t know about you, but I don’t loooove the native browser error messages. For one, they don’t match the
page design. On top of that, you only see one at a time, so if you’ve got a complex form, users may have to keep hitting
submit and fixing the errors one at a time. Another thing is they show up as soon as you start typing. Well, there are a
lot of issues here and I could go on.
First, if you want to show your own messages, you’ve got to opt-in to this behavior by setting a validate
attribute on the <hotfx-form> element. This turns off the browser’s built-in validation messages and
let’s you write your own errors.
Here’s how we added error messages inline to our demo form:
Pretty neat! The error message needs to immediately follow the input but that’s probably the case anyway. If you want to
put it in a different place just make sure to change the selector so that an input with the pseudo class
:invalid will show the error message associated with it. These days, the :has() selector
basically makes anything possible.
Well there’s still the issue that these errors will appear immediately when the form is loaded. If you want the message
to appear only after the user has focused the input for the first time, you could use the :user-invalid
pseudo class, but I still find that distracting while entering text.
To show the error emssages only after the form has been submitted once, we can use a custom state from the
<hotfx-form> element itself:
If for some reason, you like to live dangerously and you’d like to disable all input validation, you can add the
novalidate attribute on the <form>. To summarize, here’s how you use these attributes to
control validation:
Use native form validation: set no attributes and write no error messages. Easy, but ugly.
Use your own error messages: set validate on the <hotfx-form> element, write error
messages and style them, activating them using the CSS above.
Turn off validation entirely: set novalidate on the <form> element.
Server Error Messages
There’s one final piece to this, which is showing the user an error from the server. Client side validation is great,
but the final arbiter of truth will be the server and if the server has a problem with the input, we need to let the
user know. Also, the server could just die (as servers do) and you user may want to know that too.
When the <hotfx-form> element gets any response from the server, it will set it into a
CSS custom property (err, variable) which you can then show to users in a ::before or
::after element. Something like this:
This could also work to show the response from the server after a successful submission as well. Here’s another demo
with all the client-side validation turned off with the novalidate attribute. Now, everytime you hit the
submit button your form is sent to the server, which will tell you if what you did was good or not.
Server Error Messages
Adding a Loading Spinner
Sometimes servers are slow—and users are impatient. Providing something flashy to look at may keep them calm for a few
seconds.
If you want to show a loading spinner, you can use the :state(loading) pseudo class. Something like this:
After the user submits their form, you may want to give them the chance to submit it again with more data. This can be
handled with a button that has type=reset.
Putting this button right next to the submit button is something of an anti-pattern because it’s easy to hit it by
accident and it will delete all of your work. But letting people reset a form after it’s already been submitted once can
be quite handy. I mean, if someone wants to signup to your email list with all of their email addresses, who are we to
stop them?
Posting Images or Other Files
By default, HTML forms send their data as an URL-encoded strings. So for our demo form this
would look something like name=Steve&message=Steve%27s+message+as+an+URL-encoded+string. Lovely how
that apostrophe turns into %27.
That works great for simple inputs, but if you want to include an image or a different type of file upload, this string
based approach is not going to cut it. You’ll need to change the form’s encoding by setting the attribute
enctype="multipart/form-data".
The <hotfx-form> knows how to handle this and your file uploads should work fine as long as the
server knows how to process them. And, the very same form works just fine without JavaScript, of course.
Roadmap
This element is totally functional and very useful right now, but this form stuff goes deep and there’s a lot more it
could do. Here’s a few things I think might be useful:
Fire an event with the form result and any data returned from the server. This could help show the form results
imperatively or reset the form using a timeout.
Allow error messages to show the browser’s error text. So, if your input is too long you’ll see a message indicating
exactly that and not the generic message you wrote yourself.
Send data as JSON. This could turn form input names, like data[attributes][name], into deeply
nested JSON, such as { data: { attributes: { name: "" }}}. It could also send files
as base64 strings.
Use the form in a <dialog> element and have it close the dialog. Great for those super annoying email
signups.
As always, you can submit bugs or feature requests on Github by creating a
new issue.